Recently I spent some time investigating the Google Data .NET Client library. Specifically, I was interested in the YouTube Data API. What I wanted to do was programmatically upload a video file to my YouTube account. I ran into a couple of (minor) speed bumps along the way, and noticed there were a few things that weren't as clear as they should have been. Hopefully I can clarify the problems I encountered, in case future developers run into the same trip ups. Let's get started.
For the context of this post, I should explain my development environment. I am using the following:
OK, so we're going to set up a very basic ASP.NET MVC web site that will basically do two things:
First things first: download the most up to date version of the Google Data .NET Client library and follow the instructions for installing and setting it up.
Next, ensure you have a YouTube developer API key attached to your YouTube account. If you have not done this yet, go here and associate a Developer ID with your account. Take note of this ID (it's pretty long).
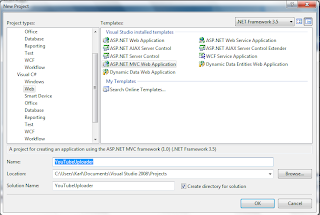
Now, let's set up a new ASP.NET MVC project. We're going to use the Visual Studio defaults here, and just name our project "YouTubeUploader".
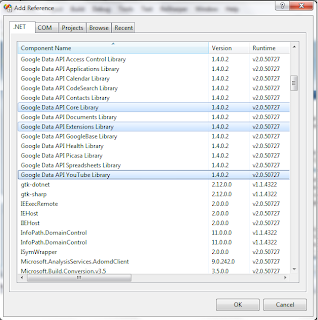
Next, we need to add some references to the Google APIs. When you install the Google Data API, there should be a solution at All Programs -> Google Data API SDK -> Google Data API SDK.sln that the setup guide tells you to open and build. Once you have done this, you can select these binaries as a reference in your current project, which is what we do here.
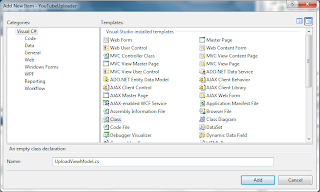
Next, we're going to create a ViewModel to encapsulate all the inputs required to pass to our video uploader. This is going to be a very basic ViewModel, with nothing more than properties for retrieving inputs for our video. Here's what the code looks like:
Like I said, very basic ViewModel here.
Next, we need to add a controller method to handle our Login logic. For simplicity sake, we're going to use the HomeController for all of our methods here. In your production situation, however, this logic might be split apart into different modules. We're just going for the basic "Hello, World" functionality here. In order to successfully make YouTube API calls (or any Google Data API, for that matter) you must retrieve an authenticated session token from the Google servers. This can be accomplished a number of different ways. Since we're trying to make a web site here, we're going to go with the AuthSub method of Google authentication. Here, we're going to provide a link to our user where they can go and authenticate themselves with the Google servers, send back a session token, and then finally re-direct the user back to a page of our choosing. This token is returned as part of the request query string, which we can handle in a number of different ways. For our purposes, we are going to use a string parameter on one of our controller methods to take the parameter and use it to create an authenticated session token in memory. The method will look like this:
(NOTE: throughout the post, I reference "http://localhost:50555/" as my development server. I am just running my site through Visual Studio 2008 and am taking the default server address provided. This may vary in your environment, so please replace this address for what your environment requires.)
What we're doing here is using a Google utility (AuthSubUtil.getRequestUrl) to generate the text for our link to provide to our users. getRequestUrl takes the following parameters:
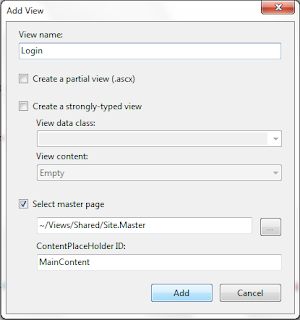
Next we add a view for our Login page. It's going to be a very generic view, with only one link on the page. Here is the whole view:
Notice how we are retrieving the URL text from Session["authSubUrl"], which we set in our Login() method. You could just as easily encapsulate this value into a ViewModel, however, I felt for the type of exercise we're performing here, this was sufficient.
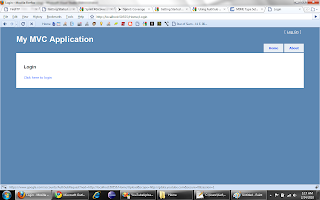
Let's compile our project now and run our website. What you see when you navigate to http://localhost:/Home/Login is similar to the following:
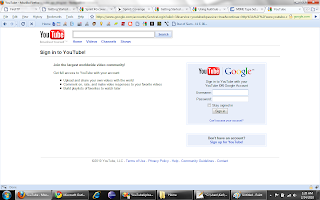
The link brings us to a very familiar page to anyone with a Google account:
Once the user has entered their credentials, the following screen shows up:
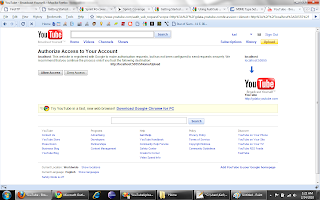
This is the warning I mentioned previously about a secure application. If you secure your site with Google, the verbiage here (according to the documentation) is omitted. I have not yet secured a site with Google yet, so I have not experienced this difference.
After clicking on "Allow Access", we're presented with the following screen:

D'oh! We don't have an Upload view or controller method yet to handle this redirect! This is what we will create next. Take a look at the URL that Google navigated to post-login.http://localhost:50555/Home/Upload?token=CPvdxbuhGRDovLiXBw That looks awfully similar to what we specified in our Login() method, doesn't it? And you can see the authenticated token in the QueryString at the end of our URL.
Next we add a controller method to handle GET requests to our Upload page. This is where we are going to handle binding our session token into a YouTubeRequestSettings object, and we'll use that to build a YouTubeRequest object, which is how we'll interact with the YouTube Data API. The method looks like this:
Ok, what we're doing here is handling the QueryString token we get back from Google as a part of the GET request by making sure our method has a string parameter (which we call token). The method then uses a method on AuthSubUtil called exchangeForSessionToken which takes a string and an AsymmetricAlgorithm and returns a token good for an entire user session. This way we only have to authenticate the user once per session and they can make as many API calls as the system allows. Since we are not using a secured certificate for authentication we are leaving this as a null parameter. However, if you choose to use this functionality in a production environment I highly suggest taking a look at the documentation on registering your app with Google to take advantage of the heightened security. As this is a simple exercise, we are omitting this.
Next we add a strongly typed view (Create) for our Upload logic (UploadViewModel). We are going to choose "Create" template from the dropdown, and our view comes out like so:

This is a very limited view. What we are doing is adding a field for every property on our UpdateViewModel. This allows the user to specify what kind of video they want to upload.
Next we add a controller method to handle the POST request for our Upload page (i.e. what happens when we click "Create"). This is where the bulk of our logic will reside. Here's what the code looks like:
Ok, so it was this method where I ran into the gotcha's that prompted me to write this post in the first place. Once again, in a production environment, you will probably have the developerKey and applicationName stored in some kind of configuration file / object or a database. For our example, we're just setting some hard-coded strings inside our method. These are used to create our YouTubeRequestSettings object. As you can see, the method takes 4 parameters, and this is the method call that was a pain to debug. The 4 parameters are:
Once you understand the functionality in setting up your YouTubeRequestSettings object the rest is a walk in the park. The YouTubeRequest object itself takes a YouTubeRequestSettings object as a parameter, so you just new() up one of those with the YouTubeRequestSettings object we just created. Then, we create a new Video() object and set the properties on it equal to the values in our UploadViewModel. This is an ideal situation for AutoMapper in that all we're doing is basically mapping properties from one object to another. However, for this example we are just going to set them explicity ourselves. Then we create a new MediaFileSource object as a property on our Video object. Be sure to escape '\' in your path, if you are using a local path (i.e. instead of C:\MyCode\Project you need C:\\MyCode\\Project). Also, for the Type property, you need the MIME type of the video you are uploading. For example, for Windows Media Video files, you want to use "video/x-ms-wmv" as your type.
And that's it! Let's run the web site now and see our results.
To make this more robust (and actually usable) you'll want to provide some kind of feedback mechanism to notify your user whether the upload failed or was successful. For this example I chose to just prove how to upload the files.
I hope this eases someone's pain and eliminates the 45 minutes - 1 hour I lost trying to figure out why my API calls weren't being correctly authenticated. Take some time and experiment with the rest of the APIs, which allows you to do pretty much anything you can do on the web site.
For the context of this post, I should explain my development environment. I am using the following:
- Windows 7 Professional (32-bit)
- Visual Studio 2008 Professional SP1
- .NET 3.5 SP1
- ASP.NET MVC 1.0
OK, so we're going to set up a very basic ASP.NET MVC web site that will basically do two things:
- Provide a link to use for authenticating a Google Account
- Provide a form to direct upload a video (including metadata)
First things first: download the most up to date version of the Google Data .NET Client library and follow the instructions for installing and setting it up.
Next, ensure you have a YouTube developer API key attached to your YouTube account. If you have not done this yet, go here and associate a Developer ID with your account. Take note of this ID (it's pretty long).
Now, let's set up a new ASP.NET MVC project. We're going to use the Visual Studio defaults here, and just name our project "YouTubeUploader".

Next, we need to add some references to the Google APIs. When you install the Google Data API, there should be a solution at All Programs -> Google Data API SDK -> Google Data API SDK.sln that the setup guide tells you to open and build. Once you have done this, you can select these binaries as a reference in your current project, which is what we do here.

Next, we're going to create a ViewModel to encapsulate all the inputs required to pass to our video uploader. This is going to be a very basic ViewModel, with nothing more than properties for retrieving inputs for our video. Here's what the code looks like:

- namespace YouTubeUploader.Models
- {
- public class UploadViewModel
- {
- public string Title { get; set; }
- public string Keywords { get; set; }
- public string Description { get; set; }
- public bool Private { get; set; }
- public string VideoTags { get; set; }
- public double Latitude { get; set; }
- public double Longitude { get; set; }
- public string Path { get; set; }
- public string Type { get; set; }
- }
- }
Like I said, very basic ViewModel here.
Next, we need to add a controller method to handle our Login logic. For simplicity sake, we're going to use the HomeController for all of our methods here. In your production situation, however, this logic might be split apart into different modules. We're just going for the basic "Hello, World" functionality here. In order to successfully make YouTube API calls (or any Google Data API, for that matter) you must retrieve an authenticated session token from the Google servers. This can be accomplished a number of different ways. Since we're trying to make a web site here, we're going to go with the AuthSub method of Google authentication. Here, we're going to provide a link to our user where they can go and authenticate themselves with the Google servers, send back a session token, and then finally re-direct the user back to a page of our choosing. This token is returned as part of the request query string, which we can handle in a number of different ways. For our purposes, we are going to use a string parameter on one of our controller methods to take the parameter and use it to create an authenticated session token in memory. The method will look like this:
(NOTE: throughout the post, I reference "http://localhost:50555/" as my development server. I am just running my site through Visual Studio 2008 and am taking the default server address provided. This may vary in your environment, so please replace this address for what your environment requires.)
- public ActionResult Login()
- {
- Session["authSubUrl"] = AuthSubUtil.getRequestUrl("http://localhost:50555/Home/Upload", "http://gdata.youtube.com", false, true);
- return View();
- }
What we're doing here is using a Google utility (AuthSubUtil.getRequestUrl) to generate the text for our link to provide to our users. getRequestUrl takes the following parameters:
- continueUrl: Where the user will be redirected after authenticating. For our example, I used my local development server (http://localhost:50555/Home/Upload) since I want to pass my authenticated session token into my Upload GET method...more on that next.
- scope: for YouTube API calls we use http://gdata.youtube.com
- secure: If you have registered your app with Google with the appropriate security credentials, you can set this to true to ensure that your API requests do not show the "Warning: Access Consent" verbiage after authenticating. Also, some API calls are not allowed unless your app is registered. For our testing, we send in false.
- session: Whether the authenticated token should persist over multiple API calls or just be a "one-time-only" shot. This becomes very clear when we actually create our YouTubeRequest object.
Next we add a view for our Login page. It's going to be a very generic view, with only one link on the page. Here is the whole view:

- <%@ Page Title="" Language="C#" MasterPageFile="~/Views/Shared/Site.Master" Inherits="System.Web.Mvc.ViewPage" %>
- <asp:Content ID="Content1" ContentPlaceHolderID="TitleContent" runat="server">
- Login
- </asp:Content>
- <asp:Content ID="Content2" ContentPlaceHolderID="MainContent" runat="server">
- <h2>Login</h2>
- <a href="<%= Session["authSubUrl"] %>">Click here to login</a>
- </asp:Content>
Notice how we are retrieving the URL text from Session["authSubUrl"], which we set in our Login() method. You could just as easily encapsulate this value into a ViewModel, however, I felt for the type of exercise we're performing here, this was sufficient.
Let's compile our project now and run our website. What you see when you navigate to http://localhost:/Home/Login is similar to the following:

The link brings us to a very familiar page to anyone with a Google account:

Once the user has entered their credentials, the following screen shows up:

This is the warning I mentioned previously about a secure application. If you secure your site with Google, the verbiage here (according to the documentation) is omitted. I have not yet secured a site with Google yet, so I have not experienced this difference.
After clicking on "Allow Access", we're presented with the following screen:

D'oh! We don't have an Upload view or controller method yet to handle this redirect! This is what we will create next. Take a look at the URL that Google navigated to post-login.http://localhost:50555/Home/Upload?token=CPvdxbuhGRDovLiXBw That looks awfully similar to what we specified in our Login() method, doesn't it? And you can see the authenticated token in the QueryString at the end of our URL.
Next we add a controller method to handle GET requests to our Upload page. This is where we are going to handle binding our session token into a YouTubeRequestSettings object, and we'll use that to build a YouTubeRequest object, which is how we'll interact with the YouTube Data API. The method looks like this:
- public ActionResult Upload(string token)
- {
- Session["token"] = AuthSubUtil.exchangeForSessionToken(token, null);
- return View();
- }
Ok, what we're doing here is handling the QueryString token we get back from Google as a part of the GET request by making sure our method has a string parameter (which we call token). The method then uses a method on AuthSubUtil called exchangeForSessionToken which takes a string and an AsymmetricAlgorithm and returns a token good for an entire user session. This way we only have to authenticate the user once per session and they can make as many API calls as the system allows. Since we are not using a secured certificate for authentication we are leaving this as a null parameter. However, if you choose to use this functionality in a production environment I highly suggest taking a look at the documentation on registering your app with Google to take advantage of the heightened security. As this is a simple exercise, we are omitting this.
Next we add a strongly typed view (Create) for our Upload logic (UploadViewModel). We are going to choose "Create" template from the dropdown, and our view comes out like so:

- <%@ Page Title="" Language="C#" MasterPageFile="~/Views/Shared/Site.Master" Inherits="System.Web.Mvc.ViewPage<YouTubeUploader.Models.UploadViewModel>" %>
- <asp:Content ID="Content1" ContentPlaceHolderID="TitleContent" runat="server">
- Upload
- </asp:Content>
- <asp:Content ID="Content2" ContentPlaceHolderID="MainContent" runat="server">
- <h2>Upload</h2>
- <%= Html.ValidationSummary("Create was unsuccessful. Please correct the errors and try again.") %>
- <% using (Html.BeginForm()) {%>
- <fieldset>
- <legend>Fields</legend>
- <p>
- <label for="Title">Title:</label>
- <%= Html.TextBox("Title") %>
- <%= Html.ValidationMessage("Title", "*") %>
- </p>
- <p>
- <label for="Keywords">Keywords:</label>
- <%= Html.TextBox("Keywords") %>
- <%= Html.ValidationMessage("Keywords", "*") %>
- </p>
- <p>
- <label for="Description">Description:</label>
- <%= Html.TextBox("Description") %>
- <%= Html.ValidationMessage("Description", "*") %>
- </p>
- <p>
- <label for="Private">Private:</label>
- <%= Html.TextBox("Private") %>
- <%= Html.ValidationMessage("Private", "*") %>
- </p>
- <p>
- <label for="VideoTags">VideoTags:</label>
- <%= Html.TextBox("VideoTags") %>
- <%= Html.ValidationMessage("VideoTags", "*") %>
- </p>
- <p>
- <label for="Latitude">Latitude:</label>
- <%= Html.TextBox("Latitude") %>
- <%= Html.ValidationMessage("Latitude", "*") %>
- </p>
- <p>
- <label for="Longitude">Longitude:</label>
- <%= Html.TextBox("Longitude") %>
- <%= Html.ValidationMessage("Longitude", "*") %>
- </p>
- <p>
- <label for="Path">Path:</label>
- <%= Html.TextBox("Path") %>
- <%= Html.ValidationMessage("Path", "*") %>
- </p>
- <p>
- <label for="Type">Type:</label>
- <%= Html.TextBox("Type") %>
- <%= Html.ValidationMessage("Type", "*") %>
- </p>
- <p>
- <input type="submit" value="Create" />
- </p>
- </fieldset>
- <% } %>
- <div>
- <%=Html.ActionLink("Back to List", "Index") %>
- </div>
- </asp:Content>
This is a very limited view. What we are doing is adding a field for every property on our UpdateViewModel. This allows the user to specify what kind of video they want to upload.
Next we add a controller method to handle the POST request for our Upload page (i.e. what happens when we click "Create"). This is where the bulk of our logic will reside. Here's what the code looks like:
- [AcceptVerbs(HttpVerbs.Post)]
- public ActionResult Upload(UploadViewModel uploadViewModel)
- {
- const string developerKey = "THIS_IS_WHERE_YOUR_REALLY_LONG_DEVELOPER_API_KEY_GOES";
- const string applicationName = "THIS_IS_WHERE_YOUR_APP_NAME_GOES";
- _settings = new YouTubeRequestSettings(applicationName, "ThisCanSeriouslyBeAnyString_It'sBeenDeprecated", developerKey, (string) Session["token"]);
- _request = new YouTubeRequest(_settings);
- var newVideo = new Video();
- newVideo.Title = uploadViewModel.Title;
- newVideo.Keywords = uploadViewModel.Keywords;
- newVideo.Description = uploadViewModel.Description;
- newVideo.YouTubeEntry.Private = uploadViewModel.Private;
- newVideo.YouTubeEntry.Location = new GeoRssWhere(uploadViewModel.Latitude, uploadViewModel.Longitude);
- wVideo.Tags.Add(new MediaCategory(uploadViewModel.VideoTags, YouTubeNameTable.DeveloperTagSchema));
- newVideo.YouTubeEntry.MediaSource = new MediaFileSource(uploadViewModel.Path, uploadViewModel.Type);
- var createdVideo = _request.Upload(newVideo);
- return View();
- }
Ok, so it was this method where I ran into the gotcha's that prompted me to write this post in the first place. Once again, in a production environment, you will probably have the developerKey and applicationName stored in some kind of configuration file / object or a database. For our example, we're just setting some hard-coded strings inside our method. These are used to create our YouTubeRequestSettings object. As you can see, the method takes 4 parameters, and this is the method call that was a pain to debug. The 4 parameters are:
- applicationName: The name of our application, as specified in our YouTube Account screen, to the left of our developer api key.
- client: If you look on your YouTube account screen (as of February 24th, 2010) you'll notice thereis not a client id on your screen. In fact, there is verbiage stating that they are no long required.Use any string you want here. Anything. I used "ThisIsMyRidiculouslyLongClientIdStringThatWillWorkJustBecause" and that is fine. It can be anything. I don't know why this hasn't been deprecated yet, but hopefully in the future it does to reduce confusion.
- developerKey: This is your developer key from your YouTube account page. It's really long, so be sure when you copy / paste it in that you grabbed everything.
- authSubToken: This is the string version of the AuthSub session token we created in our Login() method.
Once you understand the functionality in setting up your YouTubeRequestSettings object the rest is a walk in the park. The YouTubeRequest object itself takes a YouTubeRequestSettings object as a parameter, so you just new() up one of those with the YouTubeRequestSettings object we just created. Then, we create a new Video() object and set the properties on it equal to the values in our UploadViewModel. This is an ideal situation for AutoMapper in that all we're doing is basically mapping properties from one object to another. However, for this example we are just going to set them explicity ourselves. Then we create a new MediaFileSource object as a property on our Video object. Be sure to escape '\' in your path, if you are using a local path (i.e. instead of C:\MyCode\Project you need C:\\MyCode\\Project). Also, for the Type property, you need the MIME type of the video you are uploading. For example, for Windows Media Video files, you want to use "video/x-ms-wmv" as your type.
And that's it! Let's run the web site now and see our results.
To make this more robust (and actually usable) you'll want to provide some kind of feedback mechanism to notify your user whether the upload failed or was successful. For this example I chose to just prove how to upload the files.
I hope this eases someone's pain and eliminates the 45 minutes - 1 hour I lost trying to figure out why my API calls weren't being correctly authenticated. Take some time and experiment with the rest of the APIs, which allows you to do pretty much anything you can do on the web site.


